Shopify Setup Checklist
We’ve been asked many times “What do I have to do to make my shop work?”.
Shopify configuration is easy to use and Shopify provides guides, but it seems that a clear checklist of what a store owner needs to do, to get his store up and running, is not that easy to find.
We hope you will find this checklist useful.
We will focus here on the technical setup of your Shopify store and less on the business side topics, so we assume you already chose a name for your store and created your store.
If you didn't do it yet, you may get in touch with us, to get your 30 days trial store.
To simplify this checklist, let’s say your store name is your-store.
When you create a new store, Shopify creates a free domain that looks like this:
- your-store.myshopify.com
To log into your admin dashboard, go to:
- your-store.myshopify.com/admin
Now, let's get through the list we prepared for you!
- Choose your shop theme
- Settings
- General settings
- Payment providers
- Checkout
- Shipping
- Taxes
- Notifications
- Billing
- Products
- Add your products
- Organize your products
- Online store
- Add Pages
- Create your store's menus
- Apps
- There are a lot of apps available in the Shopify App Store which can improve your store front end or make your store operation more efficient. You have to see which one is a good fit for your store.
- Take care that using too many apps may slow down your online store.
- Just one recommendation: most stores use the Product Reviews app
- Prepare to launch
- Add your domain
- Review your store
- Remove the password page
This is a very important step. The theme you select influences the look and feel of your store as well as its performance.
There are many options available, in the Shopify theme store or on Themeforest.
Take your time and look at the demos. It's a time well spent!
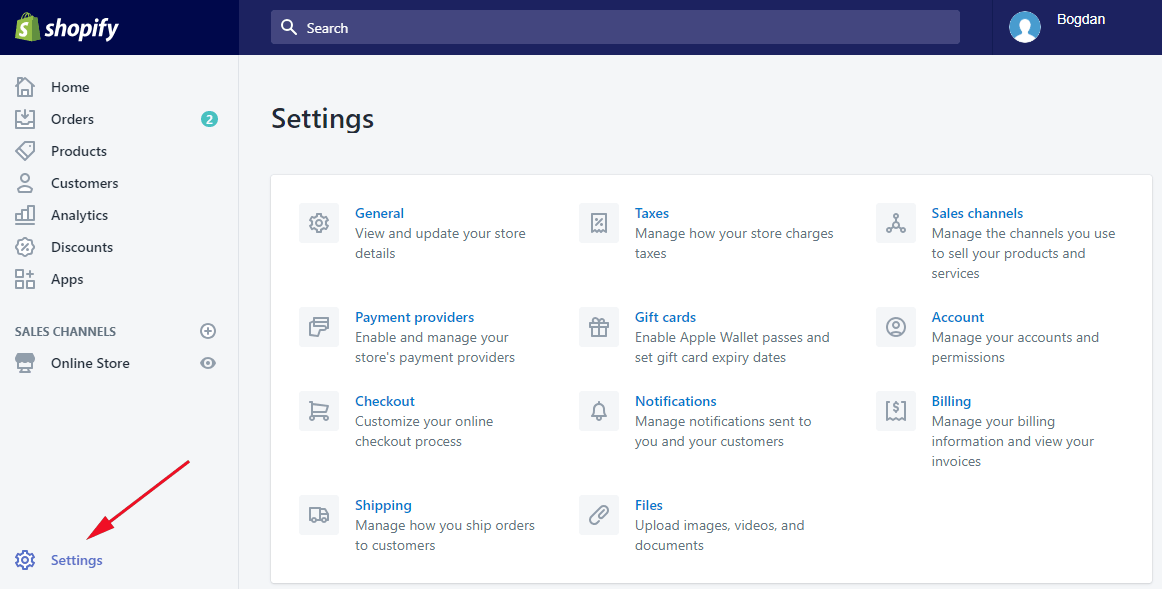
You can access the settings panel from the link found in the bottom left corner of your admin dashboard.

This is where you setup your business address and contact details, store’s standards and formats, as well as the shop’s currency and currency formatting.
Choose the way that your customers pay for orders, and also where you receive payments.
You should have multiple options for the customer to pay, like PayPal, Credit card and maybe Cash on Delivery.
Create your store's refund, privacy, and terms of service statements, and add them to your checkout page.
You should also review all other options and customize the style of your checkout. The checkout language can also be changed from here.
You need to define in which countries and regions you will ship your products and configure the cost of shipping.
Shopify allows you to configure Price based rates or Weight based rates.
If you are shipping to Romania you may consider our integration apps for FanCourier and DPD to speed up your delivery process.
Customize the way that taxes are calculated on your store. Depending on which countries you are shipping to or from, the taxes might differ. Please check with your accountant to be sure these are set correctly.
Shopify is able to send a lot of email notifications to your customers, when the status of an order changes, on shipping events or related to account changes.
Shopify also provides nice templates for all these messages, which you can customize or translate to your shop’s language.
Here you have to set the credit card used to pay your invoices from Shopify. You need to do it before moving to a paid account.
Click on the Products link on the left side of your admin dashboard.
You can manually add and configure products, but if you have many products to add we highly recommend using the Import functionality.
Help customers to find your products by grouping them into collections.
Collections can be manual (you add products of your choice) or automatic (based on rules applied to your products). We recommend using the automatic collections.
To give more information to your customers you have to add at least a Contact page and an About us page.
Pages to display your Terms and Policies are also highly recommended.
Build a menu so that customers can browse your store.
You can create as many menus as you like. Most themes include a menu on the page header and one in the footer. That’s a minimum.
Use them to link to your pages, products, collections, blogs or external sites.
Menus are configured from Online store / Navigation.
Use an existing domain or buy a new domain to showcase your brand.
Shopify provides you with the your-store.myshopify.com domain, but this is not the best one to represent your brand. You may want to use something like your-store.com for example.
Go to Online store / Domains to add your domain.
Make sure it works, do few test orders!
Go to Online store / Preferences, scroll down to Password protection section and uncheck the Enable password checkbox.
Now the entire world can access your store!
